A kitchen sink looks simple, yet installation errors can create expensive, hidden damage. A loose supply connection may drip behind the cabinet for weeks. Water can stain plywood, swell particleboard, and encourage mold growth before anyone notices.
So, what are common mistakes when installing a kitchen sink? The most frequent problems include incorrect measurements, poor sealant application, unsupported sink weight, reversed hot and cold lines, and missing leak tests. These errors often appear during rushed weekend installations. One overlooked detail matters: the drain tailpiece must align naturally, not rely on force or excessive bending.
The U.S. Environmental Protection Agency’s WaterSense program reports that household leaks can waste nearly 10,000 gallons of water annually. Across the United States, leaks may waste nearly one trillion gallons each year. These figures show why a small sink connection deserves professional attention. The International Code Council also emphasizes compliant plumbing connections, proper drainage, and accessible shutoff valves in residential plumbing guidance. Manufacturer instructions remain equally important because sink clips, countertops, and drain assemblies differ by model.
This guide examines ten common installation mistakes through practical, code-aware advice. It focuses on visible details, such as a crushed gasket, a moving faucet base, or water pooling beneath the trap. Some recommendations may seem obvious. They are still often skipped. A careful installer should measure twice, support the basin correctly, and test every joint with dry paper towels. Even experienced renovators can miss one connection. That is worth remembering.
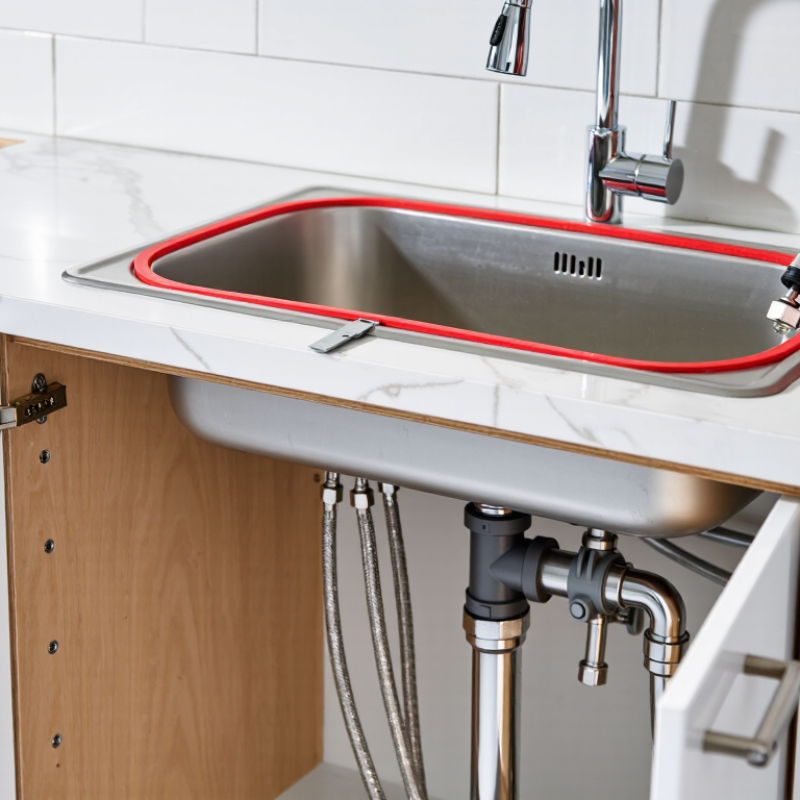
Choosing the wrong sink size is one of the most expensive kitchen installation mistakes. Measure the cabinet opening, countertop depth, and available plumbing space before ordering. A sink that is too wide may weaken the cabinet or leave little room for faucets and accessories. A small sink can also feel awkward when washing large pans.
Style matters more than appearance. A deep basin needs enough clearance beneath the counter, especially when drawers sit below it. Farmhouse-style sinks often require cabinet modifications, while undermount sinks need a solid, carefully finished countertop edge. Drop-in models are usually simpler, but their rims can collect crumbs and standing water. I once saw a sink selected for its striking shape, only to discover that the drain blocked a cabinet shelf. It looked good. It worked poorly.
The mounting method must match the countertop material and installation skill. Undermount sinks depend on accurate support, compatible adhesive, and a fully sealed edge. If the sink shifts during curing, water may enter the cabinet or damage the counter. Check the manufacturer’s installation requirements, even when the instructions seem obvious. A qualified installer can verify weight support, drain alignment, and faucet reach before cutting anything. Measure twice. Cut once. I still find this step easy to rush, particularly during a renovation with several trades working nearby. Small errors become visible every day.
A kitchen sink rarely fails because of the basin itself. Most problems begin with poor preparation around the cabinet, countertop, and plumbing connections.
I have seen sinks shift because cabinet walls were not square or strong enough. Measure the opening carefully, then inspect the cabinet floor for swelling, cracks, and water damage. A level surface matters. Reinforce weak panels before installation, not after the sink starts moving. Leave enough room for the drain trap and shutoff valves. Crowded plumbing becomes difficult to repair.
The countertop needs equal attention. Confirm the sink template, faucet holes, and countertop thickness before cutting. A small measurement error can leave an uneven rim or expose the cabinet edge. Dry-fit the sink first. It feels slow, but it prevents expensive corrections. Seal the contact area with a suitable waterproof sealant, following the manufacturer’s curing time.
Plumbing connections should align without force. Hand-tighten threaded parts first, then use the correct tool carefully. Over-tightening can crack plastic fittings or distort rubber washers. Check that hot and cold lines connect correctly, and keep the drain pipe properly supported. Run water gradually while watching every joint with a dry paper towel. Even a tiny leak shows quickly. I sometimes rushed this inspection in earlier projects, and hidden moisture later damaged the cabinet base. Local plumbing requirements may also apply, so uncertain connections deserve review by a qualified professional.
Top 10 Common Mistakes When Installing a Kitchen Sink?
A poor seal around the sink or faucet openings can begin with one small mistake. The gasket may sit unevenly, silicone may miss a corner, or the faucet base may move during tightening. Water then travels beneath the rim, where cabinets hide the damage. I have seen dry-looking countertops with swollen plywood underneath. It is easy to miss.
The U.S. Environmental Protection Agency’s WaterSense program estimates household leaks waste nearly 10,000 gallons of water annually. It also reports that 10% of homes have leaks wasting 90 gallons or more daily. The Insurance Information Institute recorded water damage and freezing as 21.5% of homeowners insurance claims from 2017–2021. The average claim was about $12,514. These figures cover wider plumbing failures, but a neglected sink seal can create the same costly pattern. A seal is not decoration.
Tips: Clean both surfaces completely. Check the gasket for twists. Apply a continuous, narrow bead of suitable sealant around the opening. Tighten fittings gradually, not aggressively. Wipe away excess sealant before it cures. Run water for several minutes, then inspect below with a dry paper towel. Repeat the check the next day. This step feels excessive. It is not. A final leak test can reveal a tiny drip before it reaches the cabinet floor. Each material behaves differently, so follow the fixture instructions and question any seal that looks uneven.
Installing a kitchen sink often fails at the connections, not the basin. A trap installed backward can block drainage and hold food waste. An S-trap can siphon its water seal. That allows sewer gases to enter the room. Model plumbing codes generally require a properly vented P-trap with a stable water seal.
Keep the trap outlet aligned with the wall drain. Do not force misaligned pipes into place. Compression washers must sit flat, with the tapered edge facing correctly. Hand-tighten first, then add a small turn with pliers. Too much force can crack plastic fittings. I have seen installers chase a slow leak by tightening everything harder. That approach often makes the damage worse.
Supply lines create another quiet risk. Cross-threaded nuts, twisted hoses, and missing washers may leak only when the cabinet is closed. The U.S. Environmental Protection Agency reports that household leaks can waste nearly 10,000 gallons of water each year. That figure makes a two-minute inspection worthwhile. Run both faucets, fill the basin, and drain it twice. Check every joint with a dry tissue. It reveals moisture faster than a fingertip. The International Plumbing Code also emphasizes accessible cleanouts and correctly sized drainage connections. Do not guess. A slightly incorrect slope or an untested trap can create recurring odors, bubbling, or cabinet damage. Recheck your work the next morning; small drips are easier to miss at installation.
Top 10 Common Mistakes When Installing a Kitchen Sink?
Ignoring Leak Tests, Drainage Flow, and Final Sink Stability
A kitchen sink can look perfectly installed while hiding serious problems underneath. During installation, check every threaded connection by hand before tightening it carefully. Over-tightening may damage washers or distort plastic fittings. I once trusted a dry cabinet floor and skipped a second inspection. That was a mistake. After running water for several minutes, a slow leak appeared near the drain basket.
Drainage flow also deserves attention. Pour two or three liters of water into the basin and watch how quickly it clears. Water should not collect around the strainer or rise toward the overflow opening. A poorly aligned drainpipe, trapped packaging material, or an incorrect slope can create weak flow. Listen for gurgling. It often signals restricted air movement or partial blockage. Professional installers should also check that the trap remains accessible for future cleaning.
Tips: Wipe every joint completely dry, then place a tissue underneath. Even a small damp mark becomes visible. Test hot and cold water separately. Let the drain run for several minutes.
Final sink stability is easy to underestimate. Press gently around each corner and observe any movement. The rim should sit evenly against the countertop, without rocking or visible gaps. Sealant alone cannot correct a loose mounting system. Support clips, brackets, or fastening hardware must hold the basin securely. Recheck the sink after the sealant cures. I have learned that rushing this final inspection creates avoidable repairs later.
The chart uses a practical risk index from 1 to 10, ranking each mistake by its likely impact on leaks, drainage performance, hygiene, or sink stability. The highest-priority checks are leak testing, drainage flow, and final sink support.
Measure the cabinet opening carefully. Check that the walls are square and strong enough. Inspect the floor for swelling, cracks, or water damage. Reinforce weak panels before installation. Leave space for the drain trap and shutoff valves. Crowded plumbing becomes difficult to repair.
Dry-fitting reveals measurement errors early. Confirm the sink template, faucet holes, and countertop thickness. A small mistake can create an uneven rim. It may also expose the cabinet edge. It feels slow, but it prevents expensive corrections.
Clean both contact surfaces completely. Check that the gasket sits flat without twists. Apply a narrow, continuous bead of suitable waterproof sealant. Tighten the fittings gradually. Wipe away excess sealant before it cures. Follow the required curing time.
Run water for several minutes. Watch every joint with a dry paper towel. Fill the basin, then drain it twice. Check underneath again the next morning. Tiny leaks are easy to miss. I once rushed this inspection and regretted it later.
Installing the trap backward can restrict drainage. It may hold food waste and create unpleasant odors. Keep the trap outlet aligned with the wall drain. Do not force misaligned pipes into place. A properly vented P-trap generally provides a stable water seal.
Hand-tighten threaded parts first. Then make a small turn with the correct tool. Excessive force can crack plastic fittings or distort washers. Compression washers must sit flat. The tapered edge must face correctly. More pressure is not always better.
Confirm that hot and cold lines connect correctly. Look for cross-threaded nuts, twisted hoses, and missing washers. Keep hoses relaxed, not sharply bent. Run both faucets while checking each joint. A dry tissue often reveals moisture quickly.
Ask for help when connections remain uncertain or badly misaligned. Local plumbing requirements may apply. Recurring odors, bubbling drains, or cabinet moisture need attention. Accessible cleanouts and suitable drainage connections matter. Guessing here can create repeated repairs.
Installing a kitchen sink may seem straightforward, but small mistakes can lead to leaks, poor drainage, cabinet damage, and an unstable sink. The most common problems begin with choosing the wrong sink size, style, or mounting method for the countertop and cabinet. Inadequate preparation of the cabinet, countertop opening, and plumbing connections can also make installation difficult. Another frequent error is creating weak or uneven seals around the sink and faucet openings, allowing water to seep into surrounding materials.
Understanding what are common mistakes when installing a kitchen sink can help prevent costly repairs. Drain assemblies, traps, and water supply lines must be aligned correctly and tightened without damaging the fittings. After installation, homeowners should test for leaks, confirm that water drains smoothly, and check that the sink remains firmly secured under normal use. Careful measurements, proper sealing, and a thorough final inspection are essential for a safe, durable, and functional kitchen sink installation.

Nura Kitchen