How to Integrate Sinks With Countertops Seamlessly?

Time:2026-10-19 Author:Sienna
0%

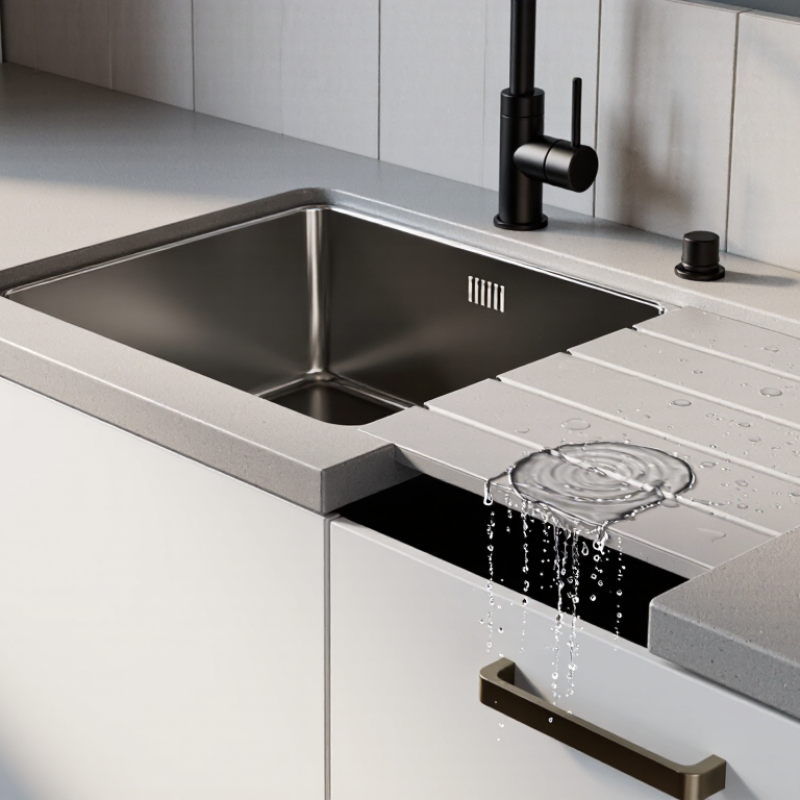
Designing a refined kitchen begins with one practical question: how to integrate sinks with countertops seamlessly without sacrificing durability, hygiene, or visual balance. The answer depends on the sink type, countertop material, cabinet structure, and installation method. An undermount sink can create a clean edge, while an integrated solid-surface sink can produce an almost uninterrupted basin and worktop. Small details matter. The rim should sit evenly, water should drain completely, and the joint should remain easy to inspect.

The National Kitchen & Bath Association’s 2024 Kitchen Trends Report identifies undermount sinks in 85% of designer-specified kitchens. That figure reflects both appearance and everyday practicality. Houzz’s 2024 U.S. Kitchen Trends Study also shows that homeowners continue investing in durable countertop upgrades during renovations. These findings support careful sink-and-surface coordination, rather than treating the sink as an afterthought. Sarah Robertson, founder of Studio Dearborn, calls the sink “the workhorse of the kitchen.” Her observation is simple, but important. A beautiful installation still fails if splashing, staining, or awkward cleaning becomes routine.

This guide examines sink dimensions, countertop cutouts, sealing systems, edge profiles, and professional fitting practices. It also considers quartz, granite, porcelain, and solid-surface materials. Some recommendations may need adjustment. Real kitchens rarely match showroom conditions. Cabinet movement, uneven walls, and rushed measurements can expose weaknesses. A seamless result requires accurate templates, compatible adhesives, and a final water test before completion.
How to Integrate Sinks With Countertops Seamlessly?

Understanding Sink and Countertop Compatibility

A seamless sink and countertop installation begins with compatibility, not appearance. Measure the cabinet opening, countertop thickness, and sink bowl depth before choosing a mounting style. Undermount sinks need a strong, accurately cut edge, while top-mount sinks can tolerate minor cutting limits. The counter material matters too. Natural stone, engineered stone, solid surface, and laminate respond differently to heat, moisture, and fasteners. Always confirm the sink’s technical sheet with the fabricator.

The drain position deserves attention. A deep bowl may collide with drawers or reduce space for the trap. Check faucet holes, backsplash clearance, and the countertop’s finished edge. For heavy sinks, support must transfer weight to the cabinet, not only the counter cutout. I once underestimated this detail during a renovation, and the plumbing became awkward. The visual fit was good. The daily use was not.

Tips: Create a full-size template before cutting. Leave enough room for sealant and future maintenance. Test the sink, faucet, and drain positions together. A small gap can collect crumbs and water. A perfectly tight fit can also create stress. Ask an experienced fabricator to inspect the material, measurements, and support plan before installation. Even careful measurements can be wrong when walls are uneven.

How to Integrate Sinks With Countertops Seamlessly?

Understanding sink and countertop compatibility starts with matching the sink installation method to the countertop material and slab thickness. The chart below shows commonly used countertop thicknesses and the installation approaches they typically support.

How to read the chart: Thinner surfaces, such as 12 mm solid-surface or porcelain slabs, often require reinforcement around the sink opening. A 20 mm stone countertop is commonly suitable for undermount and flush-mounted sinks when the cutout and support structure are properly engineered. Thicker laminate worktops may require a rimmed or top-mount sink unless additional support is added. Always verify the sink template, cabinet width, cutout dimensions, and manufacturer installation requirements before fabrication.

Measuring the Sink, Cabinet, and Countertop Dimensions

How to Integrate Sinks With Countertops Seamlessly?

Seamless sink integration begins with accurate measurements, not the countertop template. Measure the sink’s length, width, and depth at several points. Some bowls are slightly uneven. That detail matters.

Record the cabinet’s internal width and front-to-back depth. Check the doors, drawers, supports, and plumbing space beneath the sink. A cabinet may look generous outside but feel cramped inside. Leave enough clearance for the bowl, mounting hardware, waste fittings, and future repairs. Measure the wall and base units too. Small errors can shift the sink away from the intended centerline.

Measure the countertop area after confirming the cabinet position. Mark the sink centerline from the cabinet, not from a nearby wall. Walls are rarely perfectly square. For an undermount sink, follow the manufacturer’s required edge reveal, then verify the rim width around the entire opening. For a flush installation, the cutout tolerance must be even and carefully finished. Use a physical template when available, but inspect it against the actual sink. Templates can be wrong, and people can misread them. I have seen a beautifully cut surface fail because the drain collided with a cabinet rail. It was preventable.

Check the faucet holes, backsplash gap, and countertop overhang before cutting. Dry-fit the sink whenever possible. It takes extra time. It can expose a two-millimeter problem before installation turns it into expensive rework. Record every final dimension and have the installer confirm them on site.

Choosing the Right Sink Installation Method

How to Integrate Sinks With Countertops Seamlessly?

Choosing the right sink installation method affects appearance, cleaning, durability, and repair costs. In my installation experience, I assess the countertop material, cabinet support, edge profile, and household routines before cutting. An undermount sink creates a clean, uninterrupted surface. Crumbs can be pushed directly into the bowl. This method suits stone, quartz, and solid-surface countertops, but it requires strong bonding and precise support. A top-mount sink is more forgiving and easier to replace. Its visible rim, however, can interrupt a minimalist design. Flush-mounted sinks offer a nearly level transition, yet they demand extremely accurate fabrication and careful sealing.

A seamless result starts with detailed measurements. Confirm the bowl dimensions, faucet clearance, drain position, and cabinet width. Dry-fit the sink before applying sealant. Measure twice. A small error can create uneven reveals or interfere with plumbing. I once underestimated the faucet’s rear clearance, forcing an awkward adjustment after installation. That mistake reinforced a simple lesson: visual planning must include practical access. The countertop edge should also match the sink method, especially around corners and drainage areas.

Tips: Choose undermount installation for easy wiping and a refined appearance. Use top-mount installation when future replacement matters most. Ask the fabricator how the cutout will be supported. Inspect the sealant line under bright light. Even a beautiful surface can fail if moisture reaches the cabinet below. Be realistic about maintenance; seamless does not mean maintenance-free.

Preparing the Countertop for a Precise Sink Cutout

Preparing the countertop is the most important step in creating a seamless sink installation. Measure the sink itself, not only the manufacturer’s template. Check the bowl depth, rim width, faucet clearance, cabinet walls, and plumbing position. A difference of just 3 millimeters can expose the sink edge or weaken the countertop. I have seen beautiful slabs fail because the template was traced before the sink arrived.

Mark the centerline twice. Then inspect the slab for veins, fissures, seams, and internal supports. Keep the cutout away from narrow strips and corners whenever possible. Natural Stone Institute guidance recommends respecting the fabricator’s minimum edge distances and reinforcing vulnerable areas. These limits vary by material and sink design, so guessing is poor practice. Leave room for polishing, clips, and a flexible sealant joint.

Dry-cutting engineered stone or natural stone creates respirable crystalline silica. OSHA’s silica standard sets a permissible exposure limit of 50 micrograms per cubic meter over an eight-hour shift, with an action level of 25 micrograms. Use wet cutting, local extraction, suitable respiratory protection, and controlled dust cleanup. The exact method still depends on the material and workshop. That part is easy to underestimate. Before cutting, confirm the final dimensions on site, protect the finished surface, and support the slab continuously. A precise opening is useful only when the surrounding countertop remains strong.

Sealing, Mounting, and Finishing the Sink Installation

How to Integrate Sinks With Countertops Seamlessly?

A seamless sink installation depends on three details: accurate mounting, a continuous seal, and careful finishing. The 2024 Houzz U.S. Kitchen Trends Study reports that 74% of renovating homeowners replace their countertops. That investment deserves more than a visible silicone bead.

Begin by dry-fitting the sink and checking the countertop opening from above. For an undermount sink, use mechanical brackets or support rails. Adhesive alone is not a reliable structural solution. Clean both surfaces with a manufacturer-approved solvent, then apply a compatible 100% silicone sealant. Keep the bead continuous, especially around rear corners. Moisture often enters there first.

Let the sealant cure fully before connecting the drain or testing the basin. Follow the stated curing time, usually 24 hours. Afterward, run water around the rim and inspect below with a flashlight. A perfect-looking joint can still leak. I would not hide a small uneven reveal with excessive sealant; it usually creates a dirt-catching ridge. Rechecking the cutout may be wiser, even when correction feels inconvenient.

Tips: Use painter’s tape beside the joint for a sharper finish. Remove it while the sealant is still wet. Avoid abrasive pads on finished stone. Document the sealant type and installation date for future maintenance. One overlooked detail remains common: the countertop may be level, but the sink can still twist under load. A final support check matters.

FAQS

Why should sink compatibility be checked before choosing a countertop?

Countertop materials react differently to heat, moisture, cutting, and fasteners. Confirm the sink’s technical requirements with an experienced fabricator.

What measurements should be taken before installation?

Measure the sink’s length, width, and depth at several points. Also record the cabinet opening, internal depth, countertop thickness, and plumbing space. Small errors matter.

How can an undermount sink fit accurately?

Use the required edge reveal and inspect the rim around the entire opening. The cut edge must be strong, even, and carefully finished. A physical template helps, but compare it with the actual sink.

What cabinet details can affect sink installation?

Check doors, drawers, rails, supports, and the space for waste fittings. A deep bowl may collide with a drawer or reduce trap clearance. The cabinet can look spacious outside.

How should heavy sinks be supported?

Transfer the sink’s weight into the cabinet structure, not only the countertop cutout. Use a support plan suited to the sink and cabinet. Do not rely on appearance alone.

Why should the drain and faucet positions be tested together?

The drain may conflict with a cabinet rail or restrict plumbing access. Check faucet holes, backsplash clearance, overhang, and future maintenance space. Dry-fit everything when possible.

How can countertop damage be reduced during cutting?

Mark the centerline twice and inspect veins, fissures, seams, and narrow edges. Keep the opening away from weak corners and unsupported strips. Even careful measurements can be wrong.

What safety precautions are needed when cutting stone countertops?

Stone cutting can create harmful respirable dust. Use wet cutting, local extraction, suitable respiratory protection, and controlled cleanup. Follow current workplace requirements for the material and location. Dust is easy to underestimate.

Conclusion

Learning how to integrate sinks with countertops seamlessly begins with confirming compatibility between the sink design, countertop material, and cabinet structure. Accurate measurements are essential: record the sink’s length, width, and depth, then compare them with the available cabinet space and countertop dimensions. Next, select an installation method that suits the project, such as top-mount, undermount, or flush installation, while considering appearance, support, maintenance, and the countertop’s properties.

A precise cutout is crucial for a clean, functional result. Use the sink specifications and carefully mark the opening, allowing enough room for supports, plumbing, and edge finishing. After cutting, smooth and inspect the edges before positioning the sink. Apply an appropriate sealant, secure the sink firmly, and check that it is level and evenly supported. Finally, finish the edges neatly, remove excess sealant, and test for leaks to ensure a durable, watertight connection between the sink and countertop.

Sienna

Sienna

Sienna is a skilled marketing professional with a deep expertise in our company’s core products and services. With a passion for innovation and detail, she plays a pivotal role in crafting insightful blog posts that not only highlight the unique features of our offerings but also provide valuable......